
Woodstock London - 10 Jan 2021
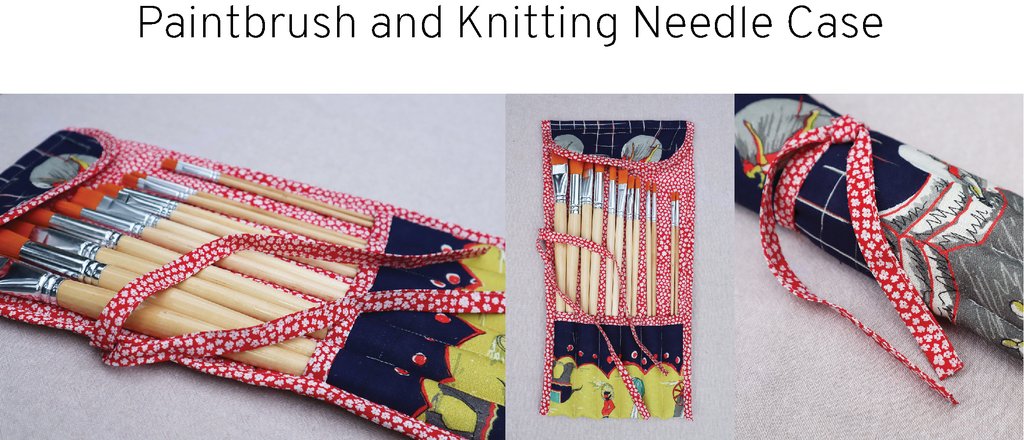
Paintbrush and Knitting Needle Case

Our first tutorial of the year is here, and it's a perfect one to get you organised for the winter months, the perfect crafting season. It's a versatile little case for your knitting needles or paintbrushes and a great little project for using up cut offs and making something useful!
TO MAKE YOUR OWN YOU WILL NEED

• Cotton fabric x 2 designs/colours
• Cotton/Bamboo wadding
• Machine thread to match fabric

1. Take both your prints, along with your wadding and cut each to size, 62cm long x 22cm wide

2. Sandwich them together with the wadding in the middle, the top fabric right side up and the bottom fabric right side down and pin.

3. Next, take the print of your choice and prepare to cut your bias strips for the tie and the edge binding. Bias binding is cut diagonally across the grain of the fabric and this enables it to bend with ease around corners. )We will be sharing a tutorial soon on a more detailed look at making your own binding.)
Lay the fabric flat with shortest sides to the left and right and longest along top and bottom. Take the bottom corner and pull it up to meet the top edge of the fabric. This will give you a triangle shaped fold, which you can press flat to give you your guide line for cutting. Alternatively you can use a set square lined up against the selvedge edge and mark along the edge at 45 degrees. Cut along this edge and then measure 5cm strips and cut enough to bind your cut fabric and to also make a tie, approx 70cm long. You will need approx 2.5 metres.

4. If your strip isn't long enough you can sew two pieces together by laying one strip face down at a right angle to the upward facing strip and sewing them together as above. Then press the seam and fold as below.

5. Fold your strips in half lengthways and press, then take the outside edges and fold them again to meet the centre fold line, pressing once more. Be careful not to stretch the binding as it will lose it's width and become uneven.

6. Open up your strip and line it up with the bottom raw (short) edge of your sandwiched panel, with right sides together. Pin in place and use the fold in the binding as a guide for your needle. Then fold the binding to the reverse side and stitch along the edge of the binding approx 2mm from the edge of the binding to finish the bound edge.

7. Once this edge is neatly pressed, fold up this bottom edge 13cm to make your pocket and pin in place.

8. Cut curves on your two top corners to give a rounded edge. Now's the time to also sew your remaining strip of binding to make the tie. Sew along the edge tucking ends in for a neat finish. Before sewing the tie on, fold it in half, and sew this in place by tacking the folded end on the right side of your panel just 5mm from the edge with the fold at the raw edge and the loose tails to the opposite side, about half way down the panel. See step 12.

9. Then pin your binding right sides together onto your panel starting from the bottom edge and finishing at the opposite corner. Folding the raw edge at the end of the binding in a little so it is enclosed.

10. Sew all the way around the panel.

11. Then, once you're done sewing on the reverse side, flip the binding to the right side and pin it in place, covering the stitch line you've just made. Press with an iron to get the binding evenly in place, and watch you don't burn your fingers! Sew all along the binding approx 2mm from the edge to finish.

12. The tie is shown here with the finished binding.

13. Next, fold your top edge down 8cm, towards the inside of your pouch, and sew along the edge about 1.5cm so that the flap stays down to protect your brushes and needles.

14. Lastly, measure your pocket lines and mark with pins. I did these 3.5cm - 3cm apart to fit the brush sizes and 3cm apart on the needle case. Sew the lines parallel and you're done! Just trim all your threads and the most satisfying bit of all is filling it up with your favourite brushes or needles.

I chose a separate print for the Knitting needle pouch, there are so many Palava prints that would make adorable pouches, you'll have fun choosing!

